Iron.io Push Queues in Laravel 4.2
Queues are a great way to speed up your web application by sending time intensive tasks into the background. Take email for example. Scripts that send emails can take a few seconds to run. It doesn’t sound like much, by a few seconds drastically decreases the “clickyness” of your app. Moving the email script to be processed in the background will give your user a much more fluid and satisfying experience.
Queues work exactly how you think they would. Think of it as a stack of item’s that need to be completed. The queue’s job is to simply take the item from the bottom of the stack, and process the job. Move on to the next item. And so on.
Traditionally, queues can be difficult to setup. However, Iron.io’s makes this incredibly easy with Push Queues. In addition, with Laravel’s Queues it couldn’t be easier to integrate into your app.
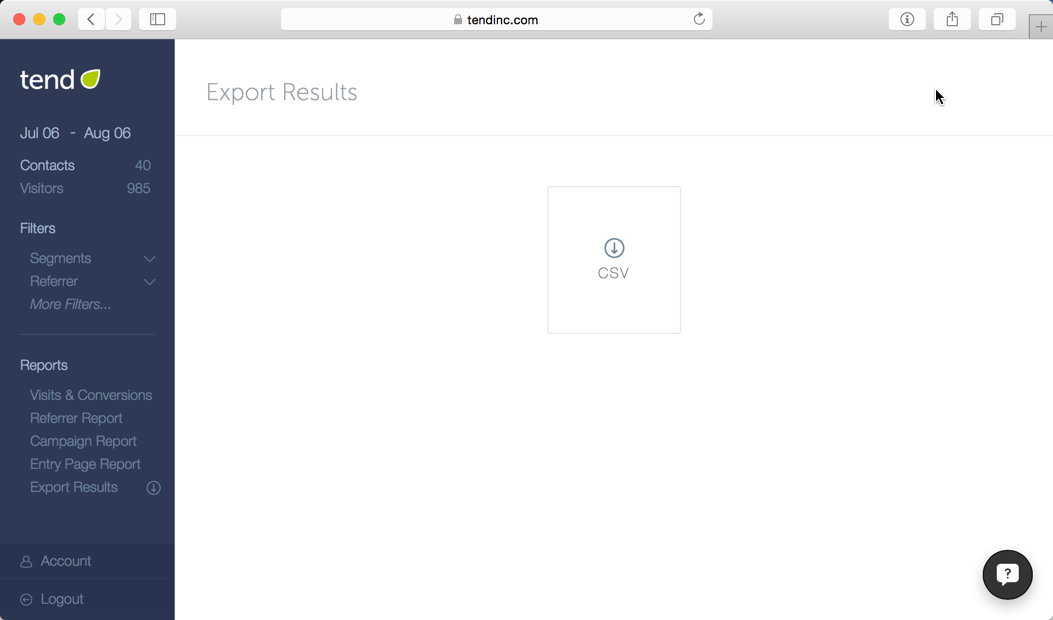
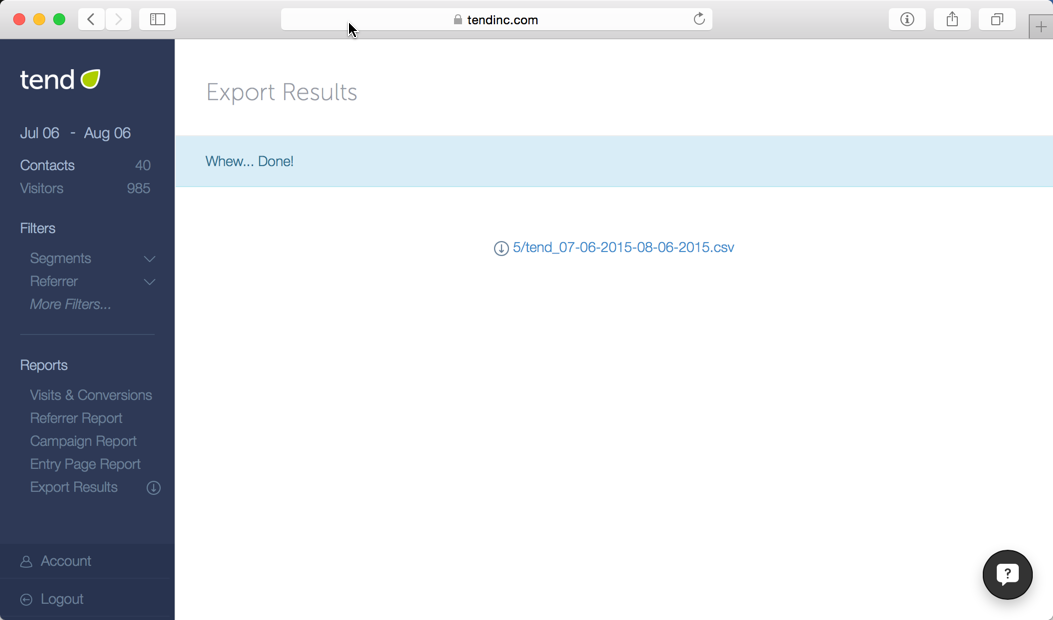
I just wrapped up adding a queue for exporting results in Tend. Before using queues, users would have to wait a few minutes to get their results. Now, by sending the export task into a queue, our users no longer have to wait around. The task will be run in the background, and the user will be notified when the export is ready for them to download.
Here’s how I did it:
Sign up for a free Iron.io account
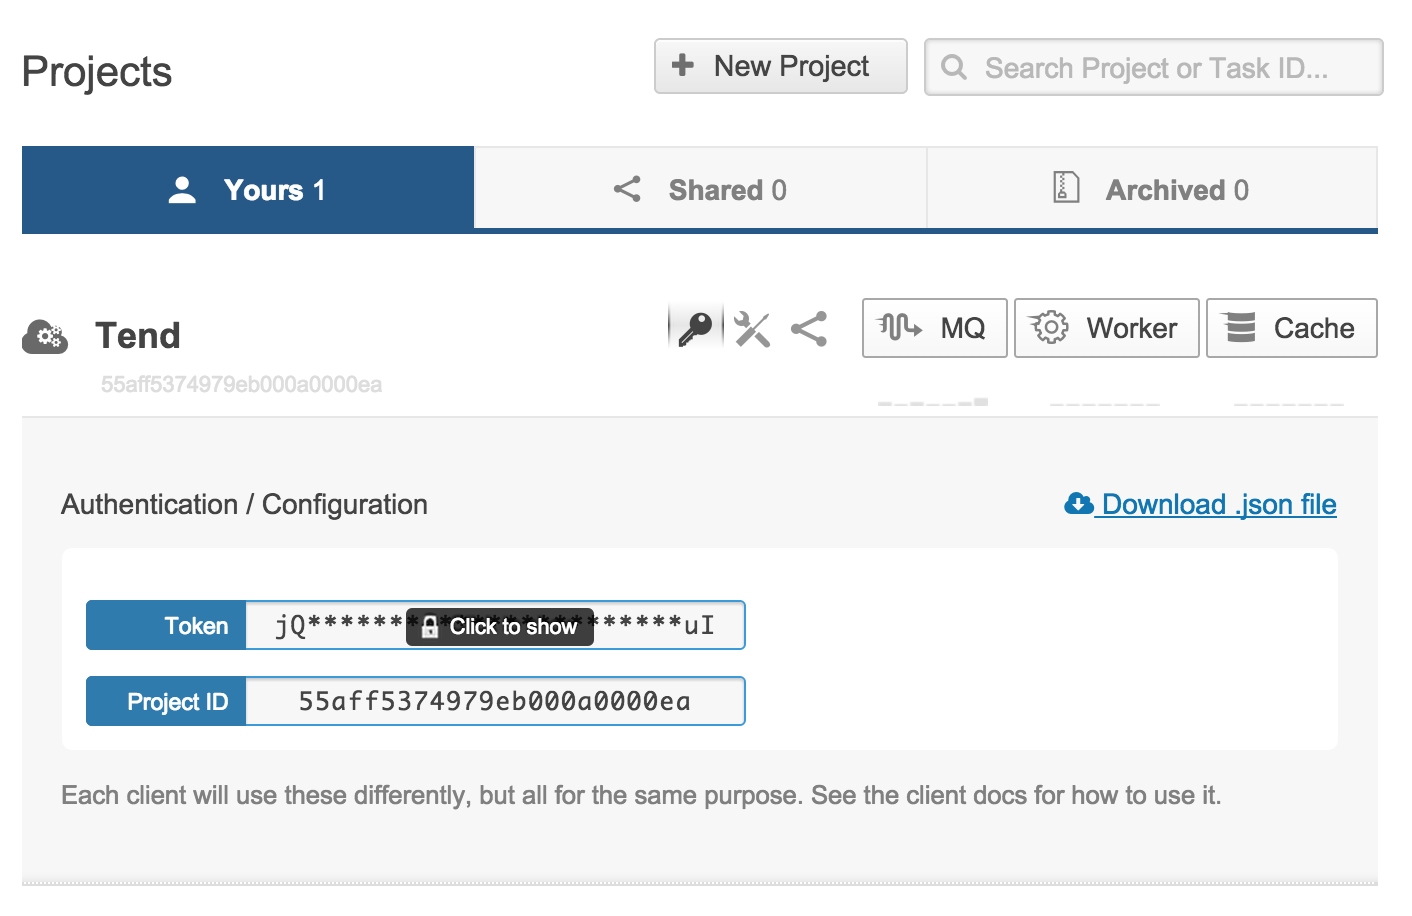
Create a new iron.io project
Click on the credentials icon. This will show you your Project ID and Token.
Update Laravel’s queue driver to use iron
In the /app/config/queue.php file, update the default queue driver to iron.
'default' => 'iron',
Add the credentials from the new iron.io project you created in Step 2.
'iron' => array(
    'driver'  => 'iron',
    'host'    => 'mq-aws-us-east-1.iron.io',
    'token'   => 'xxx',
    'project' => '55aff32bbs332hnss00ea',
    'queue'   => 'Your Project Name',
    'encrypt' => true,
),
I also added a /app/config/local/queue.php file, and copied the content into it from the original queue.php file. Keeping the default driver to sync.
'default' => 'sync',
This will allow you to test the queues in your local dev environment.
Install iron.io dependency through composer
You can find the iron package you need at here at packagist.
For whatever reason, I was an 'IronMQ' not found error with version 3. So I added "iron-io/iron_mq": "1.*" into the /composer.json file, as suggested here
Then, through the command line, in your laravel project’s root, run composer update to pull that in.
Register a new subscription
If you run php artisan, you will see an option for queue:subscribe. As it says, this will subscribe a URL to an Iron.io push queue.

And running php artisan help queue:subscribe will show us that we need a name and a URL for the queue subscription.

So we create the subscription with:
php artisan queue:subscribe Tend https://tendinc.com/queue/receive
You can confirm that the subscrition has been added by jumping back over to your iron.io account. Click on MQ (next to your project name) then Queues. You should see your new push queue displayed.

Your queue is now ready to receive new tasks, and when it does, it will hit your subscriber URL (in our case https://tendinc.com/queue/receive), with the task’s details.
Push a Queue
Let’s push a new task onto the queue. For us, we are going to be creating a task to export out the results. So in our app, when a visitor requests to export the results, we will add the following into our “export” controller.
Queue::push('export',['id' => Auth::user()->id, 'file' => $file]);
This will send a new task to iron named “export”, and will also include the user id and the file name to write the results to as an array. All of this data will be passed back to our app, when the task is ready to be run.
Respond to Iron
Next we will need to respond to iron when they send us a new export task to be completed. To do that, let’s create a new route in our /app/routes.php file.
Route::post('/queue/receive', 'QueueController@receive');
Create a new app/controllers/QueueController.php with the following:
<?php

    class QueueController extends BaseController {

        //Iron.io will hit will post to this page
        public function receive()
        {
            return Queue::marshal();
        }

}
The marshal’s job is to direct the response to the proper task to be completed. This is based on the name we provided when we posted a new queue. In our case, we gave the it the name “export.”
Execute task
The queue’s marshal is now going to be looking for an class named “export” to execute the task. So let’s give it one.
<?php
class Export {
    public function fire($job, $data) {
        //a bunch of code to export out the results & notify user when it's completed
    }
}
Notice that we are using a function named fire. This is the function that the queue marshal will look for by default. The second parameter $data will hold the array of data will initially passed to iron when creating the queue. In our case, this will be the user id and file. We simply uses the provided $data to start the export, and we notify the user when it’s completed.
The completed workflow looks like this: